This post may contain affiliate links. This means that if you click and make a purchase, I receive a small commission at no additional cost to you. I only recommend products I use and love, or that I would recommend to my mom or best friend. Please see the disclosure statement for additional information.
Glass etching is a great DIY project for personalized decor or impressive, custom gifts. Learn how to etch glass with etching cream – it’s easy!
“I’m literally crying right now.”
Crying? Oh no. That wasn’t the reaction I was hoping for.
There’s something special about a beautiful, personalized gift. Or customized décor that looks exactly how you envisioned it in your head.
An easy way to created customized, personalized décor and gifts?
With etched glass!
Etched glass is a process that alters the surface of the glass to create a frosted look. With the right tools, it’s a quick, easy process. There are a few tricks of the trade you should know though. I’m going to teach you how to etch glass with etching cream today.
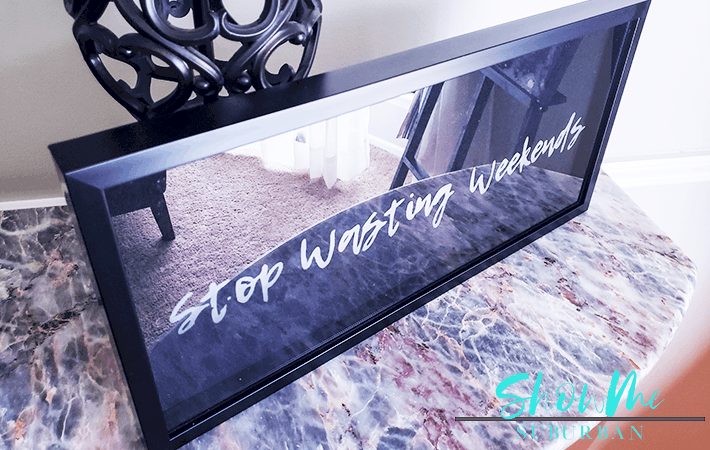
The project in these photos is a Christmas gift I made for my sweet friend Annette. She blogs at www.vanadieu.com about outdoor smarts, national park travel, and Sprinter van conversion. Her mission is to help women Stop Wasting Weekends and enjoy the great outdoors. Stop by her site and say hello!
Note that Stop Wasting Weekends is a registered trademark of Van Adieu, LLC. Used with permission 🙂
Glass Etching Supplies
The glass etching process is quick and easy, but requires some specialized tools. Here’s everything you need to etch glass.
- Glass item to etch (surprise! 😀) For Annette’s gift, I used a 9×20 shadow box similar to this one
- Armor Etch etching cream
- Die-cut machine (Cricut, Silhouette, etc) or adhesive letters if you don’t have a die-cut machine (Be sure they will fit on your glass item)
- Contact paper (If you’re using a die-cut machine)
- Sponge paint brush (I like 1-inch brushes)
- Several layers of newspaper to protect the work surface
- Rubber gloves
- Long-sleeved work shirt
A quick note: Etching cream is a corrosive material, and you should protect your skin and the surfaces in your home from coming into contact with it.
How to Etch Glass
Here’s how to etch glass, from start to finish.
Plan a Design
Because glass etching is permanent, it’s important to plan your design on the glass piece before you break out the etching cream.
- Measure the area you want to etch on the glass item. Measure it vertically and horizontally.
- If you’re using a Silhouette or Cricut die cut machine, note the measurements of the design you want to make to ensure it will fit on the glass item
- If you’re using adhesive letters, measure them to ensure they will fit on the glass item
- After measuring, Silhouette or Cricut users should cut a design on contact paper, with the paper backing against the mat, so the vinyl side is facing up (I leave it on the “cardstock” setting so it will cut the contact paper, but not the paper backing)
Prepare to Etch
When learning how to etch glass, it’s important to wrap your mind around how the finished project will look. That the glass that shows will be etched; areas covered in contact paper or vinyl will not be etched.
If you want etched letters, use the outline of the letters; if you want clear letters with etched space around them, use the letters themselves.
Once you understand how your design will look when it’s finished, it’s time to prepare the glass item for etching.
- Prepare the glass surface by thoroughly washing and drying it; avoid touching the area to be etched with your bare hands, as oils from your skin can affect the etching process
- Stick the contact paper onto the glass to form the design
- Start at one end of the contact paper, and slowly press it down, one bit at a time
- Focus on correct spacing and shape around the cutouts, especially on curved surfaces
- Press firmly to ensure a strong stick to the glass
- Add in any “islands” of contact paper, such as the insides of letters like o, g, d, a, b, p
- Do a final press around the edges of all cutouts, checking for bubbles
- Cover areas you’re not etching in solid contact paper, if needed
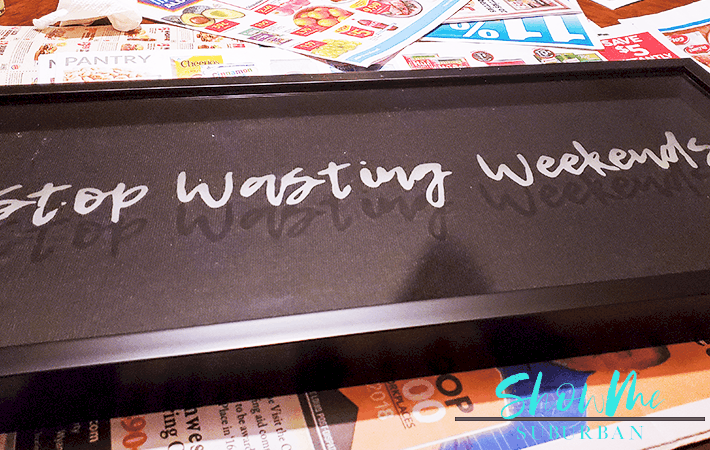
For this project, I was etching the inside of the glass. As a result, I set my Cricut to cut a mirror image of the text. If you plan to etch the outside of the glass, you should use lettering that is configured normally.
Apply Etching Cream
Once the glass is prepped, it’s time to etch.
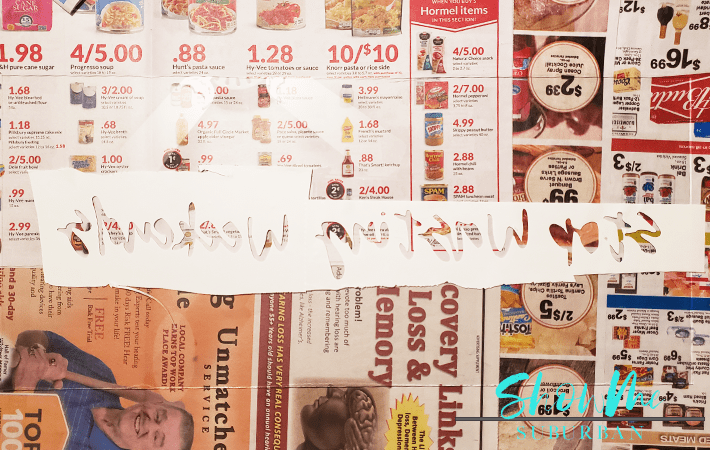
- Spread several layers of newspaper on your work surface to protect it from the etching cream
- Lay the glass piece flat, with the surface to be etched facing up
- Using a foam brush, apply a generous layer of etching cream onto the cutout (exposed glass) surfaces that you want to etch
- Ensure that the etching cream extends a bit past the edge of the cutout, onto the vinyl or contact paper; this will help ensure your etched edges are clean
- If you’re etching a curved or square piece on multiple sides (such as a wine glass or vase), etch 1 small section at a time; etching cream typically won’t run or spread on flat surfaces, but it will run on curved or vertical surfaces
- Allow the etching cream to sit on the glass surface for 10 minutes
- Rinse the etching cream off of the glass with a gentle stream of warm water
- Thoroughly clean your sink after rinsing
- If you’re working in sections, repeat the last few steps until the entire design is done
- Peel contact paper off of the glass after rinsing
- Dry the glass
 Apply a generous layer of etching cream to ensure an even etch. I took this picture right before rinsing off the etching cream, because I’d forgotten to take a picture after applying it!
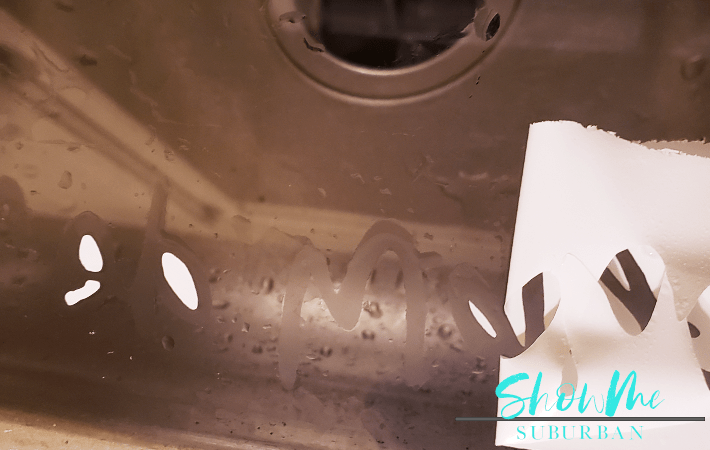 Gently peel away the vinyl after rinsing. Be sure to wash your sink out thoroughly as soon as you’re done!
How to Etch Glass: Conclusion
Etching glass is a simple process, but there are a few tricks to getting it right. Once you’ve tried your hand at a few practice pieces, you’ll be able to create amazing custom gifts and décor that will have your friends saying, “I’m literally crying right now! With joy!”
Be sure to pin this post so you’ll be able to find it later!
I’m the LUCKY friend that received this gift. Amy isn’t kidding – I said those exact words, because I literally was crying! It was one of the most thoughtful gifts I’d ever received. Thank you again Amy, I’m so blessed to have you as a friend!